artwork by David Cheung
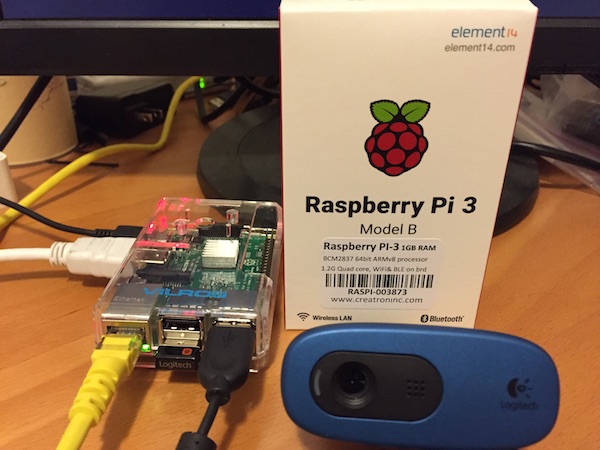
Raspberry Pi 3 for Computer Vision
With Raspberry Pi 3, developing a computer vision project is no longer difficult nor expensive. Computer vision is a method of image processing and recognition that is especially useful when applied to Raspberry Pi. You could produce your IoT with computer vision components, to secure your home, to monitor beer in your fridge, to watch your kids. Once you have an initial setup, the possibilities are endless!
This article summarizes how to setup your Raspberry Pi 3, how to install the useful computer vision libraries from OpenCV and SimpleCV, how to install the machine learning framework Orange. Equipping with this software tool suites, plus Raspberry Pi 3 has Wifi, Bluetooth and optional OpenGL built-in, your vision project will be on it’s way to reality.
Install Raspberry Pi 3
You need to Download Raspbain Jessie disk image.
After downloaded the Raspbain disk image, on Mac, we can use Pi Filler to build the SD-card image.
After first boot, run sudo raspi-config do the following:
- Expand the root file system to use the full SD-card (first option)
- Enable SSH (advance option)
- edit
/etc/hostnameto give a useful host name, e.g.my-pi - edit
/etc/hoststo point 127.0.0.1 to the hostname, e.g.my-pi - reboot
sudo shutdown -r now
we need to run the installation script with root privileges as we will be writing to an SD card.
In some distributions you can do this by prefixing the command with sudo whereas in some
you will need to su root. You should consult your OS documentation for more help on this matter.
But in the case of a standard Debian install, one would run:
sudo apt-get update
sudo apt-get upgrade
Networking Setup
If you want to setup Wifi, Bluetooth, this MakeUseOf guide on How to Upgrade to a Raspberry Pi 3 will be invaluable resource.
VNC Server
If you want to setup remote desktop access to the Raspberry Pi, the following is an excellent guide: How to control your raspberry using mac on-board tools (VNC-Connection)
Install OpenCV and SimpleCV
OpenCV is a C++ library of programming functions mainly aimed at real-time computer vision. SimpleCV provides a wrapper with many “batteries included” features, such as integration with the OCR Tesseract or the well known Orange machine learning framework.
Learning from this Install Notes, it describes a super easy and fast way to setup your Raspberry Pi with OpenCV with SimpleCV module, avoiding many painful steps described by others blogs.
Simply run the following commands to install the OpenCV necessary dependencies:
sudo apt-get install python-setuptools
sudo apt-get install python-pip
sudo apt-get install ipython python-opencv python-scipy python-numpy python-pygame
After all OpenCV dependencies are installed, we could proceed to install SimpleCV, a wrapper API that built on top of OpenCV and make computer vision really easy. Download SimpleCV from github and install from the source.
sudo pip install https://github.com/sightmachine/SimpleCV/zipball/master
sudo pip install svgwrite
After allowing those commands to run for a while (it is going to take a while, go grab a drink),
SimpleCV should be all set up. Connect a compatible camera to the board’s usb input and open up the simplecv shell.
raspberry@pi:~$ simplecv

SimpleCV:1> c = Camera()

SimpleCV:2> image = c.getImage()

SimpleCV:3> image.save('test.jpg')
SimpleCV:3: 1

SimpleCV:4> exit
Checkout the result image test.jpg to see it captures correctly.
You have confirmed that Raspberry Pi is now running SimpleCV and working with your USB camera.
Install Orange - Machine Learning Tools
Orange http://orange.biolab.si is a component-based data mining software. It includes a range of data visualization, exploration, preprocessing and modelling techniques. We shall discuss more about Orange in the future articles.
Due to the limitation of Raspberry Pi, we’re having a hard time to get Orange framework compiled on Pi. You may want to run the machine learning component of your project on a Linux PC (Ubuntu 12.04) in this moment.
You can clone from the Orange Github Source
git clone https://github.com/biolab/orange.git
To build and install Orange you can use the setup.py in the root orange directory (requires GCC, Python and numpy development headers). If you follow the previous steps to install OpenCV and SimpleCV, you already have all the required software packages on your Raspberry Pi.
To use it unpack the nightly sources and run: (warning: the compilation will take hours to complete!)
python setup.py build
sudo python setup.py install
This will also install orange-canvas script so you can start Orange Canvas from the command line.
To install orange locally run:
python setup.py install --user
This will install orange in /home/
Computer Vision Projects for Inspirations
A Fruit Classifier
An inspiring image recognition project that classifies fruits.
http://jmgomez.me/a-fruit-image-classifier-with-python-and-simplecv/
A LEGO classifier
It uses the SimpleCV library and SVM machine learning to classify Lego pieces.
https://www.youtube.com/watch?v=yupShUY5WS4
Facial Camera Tracking
Using OpenCV Harr-like facial detection, we could connect a 2-axises camera to track the facial movement.
https://www.youtube.com/watch?v=GD8ArIM-5BQ
Computer Vision and the Squirrel Hordes
This excellent PyCon presentation shows us how to use Python and OpenCV to militarizing your backyard, to use a water gun to scare away those squirrels stealing your bird foods.